Blynk Virtual Pin Example
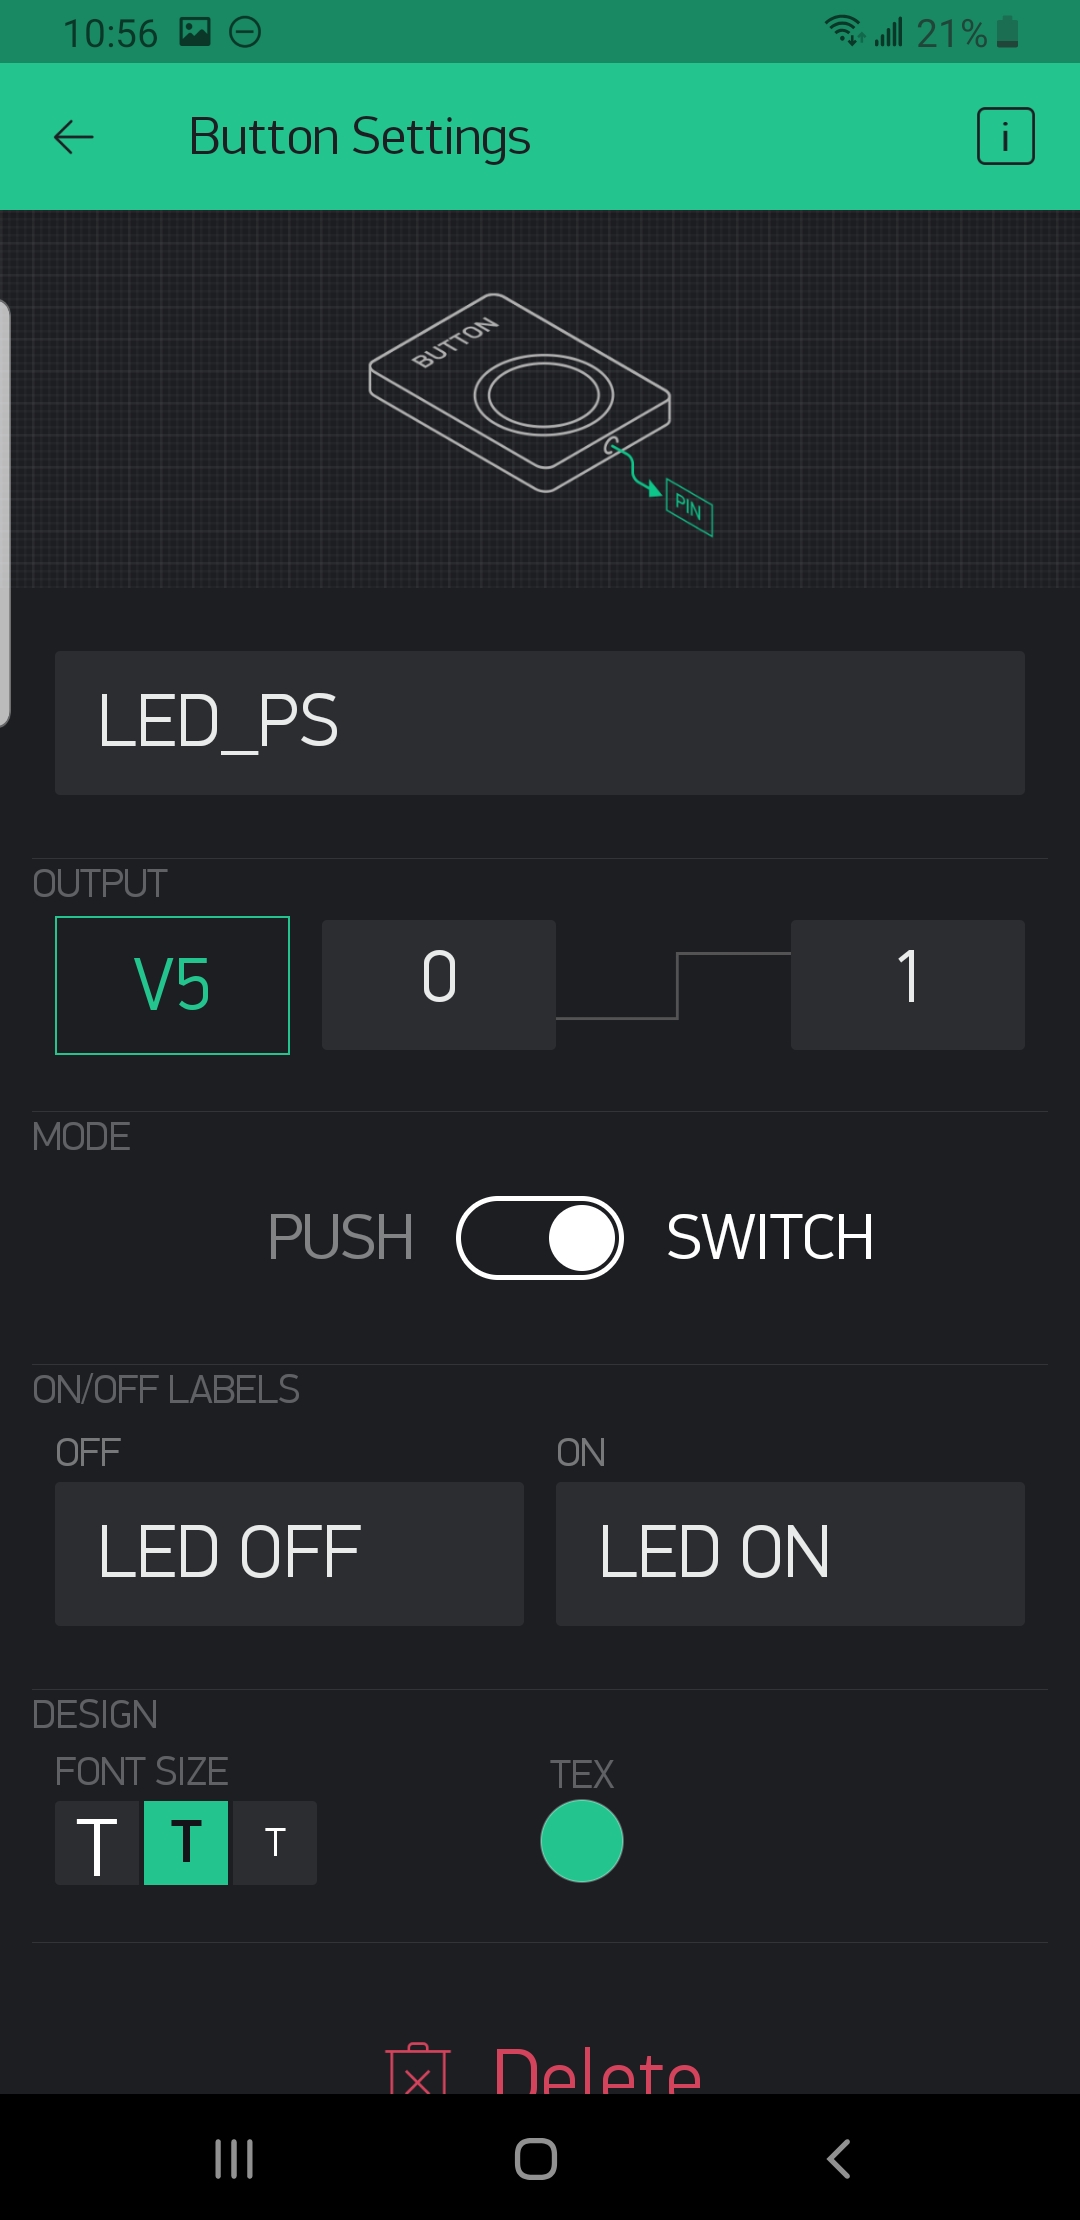
Enter a name select the virtual pin V1 and the datatype will be Integer. I chose a slider and connected it to virtual 0 in the Blynk app.
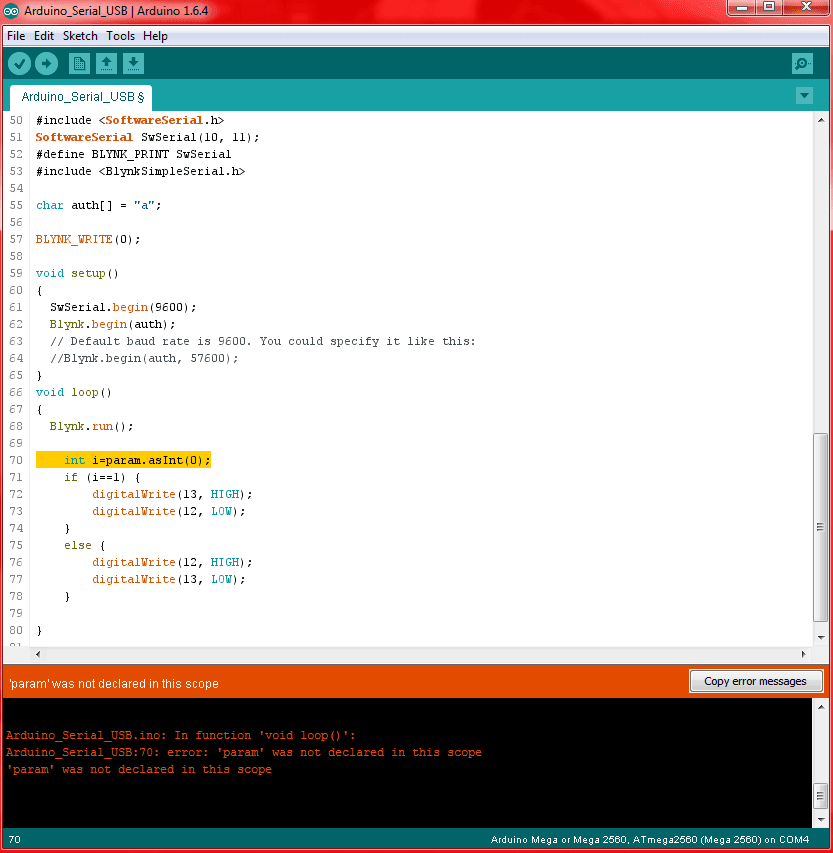
Problem With Blynk App S Virtual Pin Trying To Control A Digital Pin In Arduino Ide Need Help With My Project Blynk Community
Click Upload button on Arduino IDE to upload code to Arduino.
. Now you can set up your web dashboard. This library uses polymorphism and defines common interfaces for reading encoders and controlling motors allowing for easy open or closed loop motor control. It will be used in the Program.
You can trigger functions read I2C devices. Web Connect virtual pin Tx of first Arduino board with pin Rx of second Arduino board. On February 6th 2019 Arduino.
Also select the PIN as V0 and select the data type as integer. Avrdude Oct 08 2021 Tutorial Install avrdude On Windows Link tool avrdude This video. This will tend to move the motor continuously in a particular.
Web Enter some name in the Configuration name field above the list for example Arduino. Today we will look at another way of putting together IoT applications using microcontrollers and the Arduino IoT Cloud. Blynk offers us several predefined components.
The complete code for Controlling LED using Blynk App and ESP8266 is given at the end. Web This is the Gravity TDS Meter V10 Analog Sensor kit by the DFrobot which is completely compatible with Arduino. Arduino Sketch code Explanation.
Web A simple mobile app is designed using Blynk server to show the driver the occupied and empty slots in the parking lot where Esp8266 NodeMCU enables the communication between the sensors in the parking lot and any mobile device via a network cloud service in this case I have used Blynk server. The main focus of the Blynk platform is to make it super-easy to develop the mobile phone application. Pin 12 gets connected to the RESET pin by one wire-Typically this would be a problem because when the application starts up all pins get pulled LOW.
Web Blynk works with hundreds of hardware models and connection types. These signals will then be amplified and given to the motor. Scroll to continue with content.
Note down the Auth Token Code. After this click on the MAP widget and select virtual pin V0 as INPUT. You can try to connect a capacitor 01uF between the RST pin and the GND pin or when uploading the program set the G0 Short-circuit to GND so that G0 can be set to a low level state normally.
In this state the chemicals will no longer have a tendency to react and as a result the battery will not generate any more electric. Web After this Blynk will send an Authorization to the registered Email id. Web Now copy the example code from the browser as mentioned above and paste in Arduino IDE.
Use Blynk Example Code Builder Open Example Code Builder Choose your hardware model Choose connectivity type you use Add Auth Token it should be in your email Copy the whole code to buffer. With Virtual Pins you can send something from the App process it on the microcontroller and then send it back to the smartphone. If you do not have any potentiometers at your disposal you can also use software-based potentiometers.
This project will show how to. Anode pin of LED is connected with digital pin 2 slave through a 220 ohm current limiting resistor. ESP32 simulator with Neopixel interface.
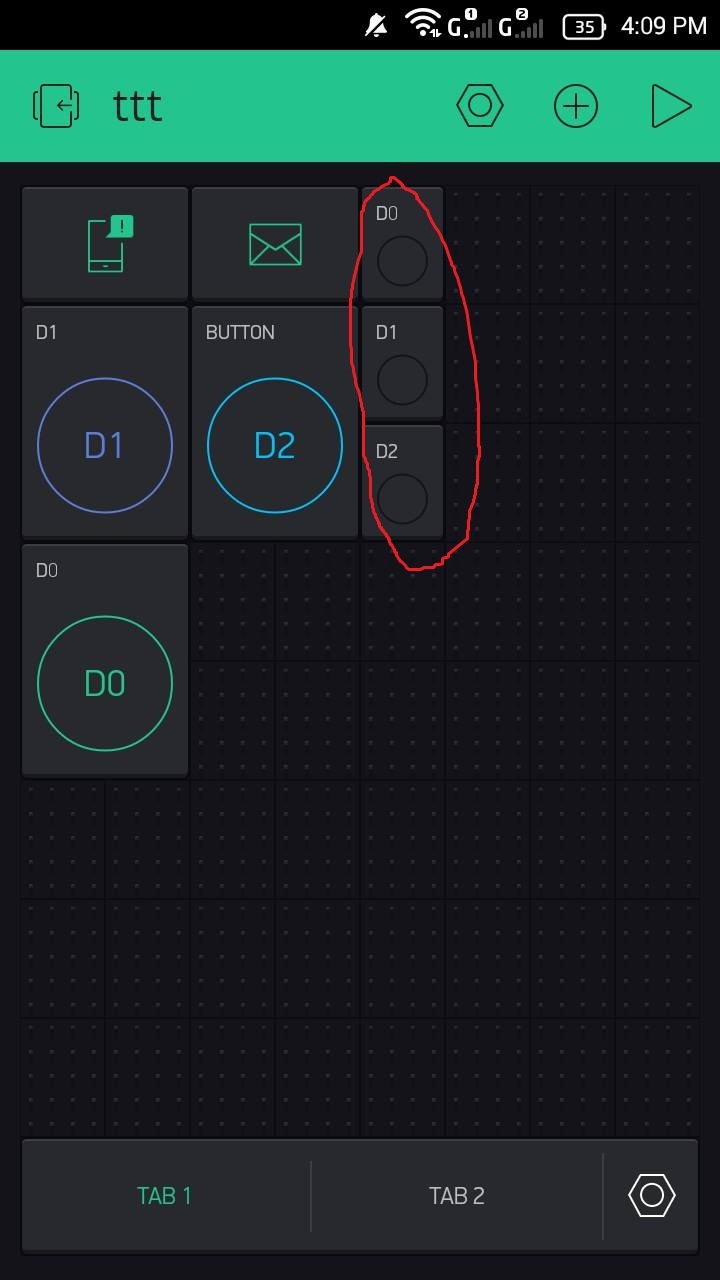
Now in the next window click on the sign to add a widget. Web Virtual ESP32 Simulator - Online - Free - Browser based October 24 2021 by share Open-Tech. I used one button.
Connect virtual pin Rx of first Arduino board with pin Tx of second Arduino board. Anything you connect to your hardware will be able to talk to Blynk. One thing that I really like about this TDS Meter is that it supports 33 to 55 Volts wide voltage input and 0 to 23 Volts analog voltage output which makes this TDS meter compatible with 5V and 33V control systems or boards.
Web With Blynk you can create smartphone applications that allow you to easily interact with microcontrollers or even full computers such as the Raspberry Pi. Next go to the Web dashboard tab. Web Next go to the datastreams tab and select the Virtual PIN.
Electronically using only 1 wire connecting an OUTPUT pin 12 in this example to the RESET pin. The chemicals in the battery will ultimately reach a state of equilibrium. Inside the Widget box select the Map widget.
Web For example when you move slider widget commands are continuously streamed to the hardware during a single slider move you can send dozens of commands. Allows ArduinoGenuino boards to simplify the use of the Joystick. In a similar way create 4 datastreams with virtual pin V1 V2 V3 and V4.
11 Now you will be flashing the hex file from the Github repo that we cloned from Sanguino. Web Reason and solution. Drag and drop 4 Switch widgets.
Includeall the required libraries for ESP8266 and Blynk App in the code as shown below. For this purpose we integrate the library from Blynk. As you will see in this course developing a mobile app that can talk to your Arduino is as easy as.
See the circuit In this example pin 13 connected to the internal LED pin 13 is blinking. Web In the motion graphic at the beginning of this section we are lighting a virtual light bulb with our moving electrons. Now go to the web dashboard tab.
Web At one input pin we have to pass a HIGH digital signal and at other a LOW signal. Basically what we have done is we have just applied a positive signal on one pin of the motor and LOW signal to another pin of the motor. Then enter the name of your choice.
There are 2 ways you can find the correct code for your hardware. Learn ESP32 coding online - Use Wokwi ESP32 simulator for your next project. There are use-cases where its needed however creating such a load may cause hardware reset.
For that drag and drop the widgets to the dasboad. Web Many experimenters make use of cloud platforms such as Blynk or roll their own solutions with protocols like MQTT and development applications like IBM Node-Red. Finally click the create button.
Web Virtual Pins are a Blynk abstraction designed to exchange any data between your hardware and Blynk. The power supply current of the port is insufficient which can cause the device to not enter the download mode normally. Then click on Create.
We will use Software Serial to configure pin 10 as RX and pin 11 as TX. Set Up Blynk Cloud Web Dashboard. Web Click on New Datastream and select Virtual Pin.
Web Control the speed with a software defined potentiometer with Blynk.

Control Devices Gpios And Beyond Blynk Documentation

Blynk Iot Lesson 3 Virtual Pins To Push Pull Data Youtube
Using Virtual Pins Blynk Community
How Do I Use Virtual Pins As Buttons Hardware And Blynk Libraries Blynk Community
No comments for "Blynk Virtual Pin Example"
Post a Comment